
How to Make a Rocking Horse out of Plywood?
Posted by RAYMOND LEI

A wooden rocking horse could be an exciting DIY project. You can make it at your home out of plywood. Later on, you can give it to your kids or anyone you want. It could also be a product you can sell.
In this post, we will tell you how you can make a rocking horse out of plywood using a wood laser cutter. The laser will cut the plywood according to the design, and then you can assemble the rocking horse.
The post aims to teach how you can make different things using a laser cutting and laser engraver machine. Other than a rocking horse, you can make a variety of things and express your creativity by following the same method.
Designing of the Rocking Horse
The process starts with the design. You will be giving DXF files to the laser cutting software, but before that, you need to make those files.
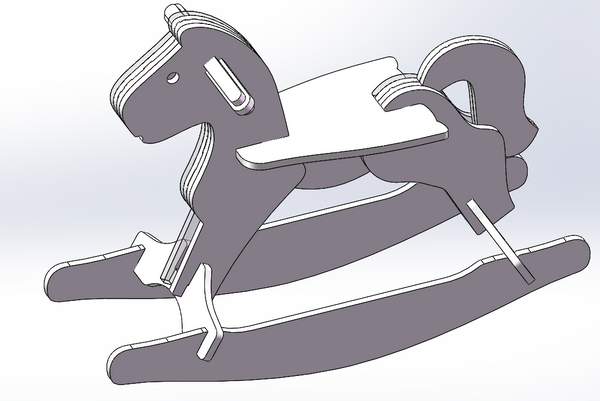
For this, you require expertise in designing such files. First, think about the design and what the horse will look like. There will be joints, holes, and other attachments to assemble the rocking horse in the end. All these things are a bit complicated. But if you have an idea how to do it, you can do it and make your own design.
Pay attention to the size and position to make everything perfect. Any miscalculation can ruin the project. Calculate the size and positions with ultimate precision. As you are working with a laser, don’t forget to include the kerf width.
There are various applications available to create the design. If you have an iPad, Procreate is an excellent option to make the design. It is a simple application, but you still need to learn how to use it. For experts, Adobe Illustrator is the best option. It will help you create images with high accuracy and precision, and that is what you require while working with a laser.
For a rocking horse, there will be separate parts. So, there is a need for a separate file for each part. After creating the designs, you need to import them as DXF files. Once you have the files, you are ready to use the laser cutting and engraving machine to make the wooden rocking horse.
You can also find designs over the internet. You will find various files for the DIY projects. For our readers, we have also included the files for the rocking horse. You can directly use it on your laser engraver.
Steps to Make Rocking Horse Using Plywood
For making the rocking horse, we will be using xTool D1, which is a diode laser cutting and engraving machine. It is a perfect machine for beginners, hobbyists, DIY enthusiasts, and small businesses. It is available with three types of laser diode modules: 5W, 10W, and 20W. 20W is the world’s most powerful diode laser module that can cut plywood easily.
Step 1: First, you need plywood. We used 20-30 A4 plywood pieces of 8mm thickness. The 20W module can easily be cut in one pass.
Step 2: Laserbox Basic is the software for xTool D1. But you can also use Lightburn. Open the software. Now, import the files one by one and place the plywood pieces.
Step 3: Place the first plywood on the honeycomb panel and import the file to the software. Adjust the focus of the laser to ensure perfect cutting.
Step 4: Set the speed at 3 mm/sec and power at 100%. If you are using the 20W laser, one pass is enough for an 8mm plywood.
Step 5: Now, you are ready to cut the plywood. Once the piece is cut, you can place another piece and import its file. You need to repeat the same process until you have all parts ready.
Step 6: If you want to customize the horse, it is a good idea to engrave a logo, name, or anything else. You can engrave on any part you like. Place the piece on the honeycomb panel and import the engraving design to the software. For engraving, reduce the power to 40%.
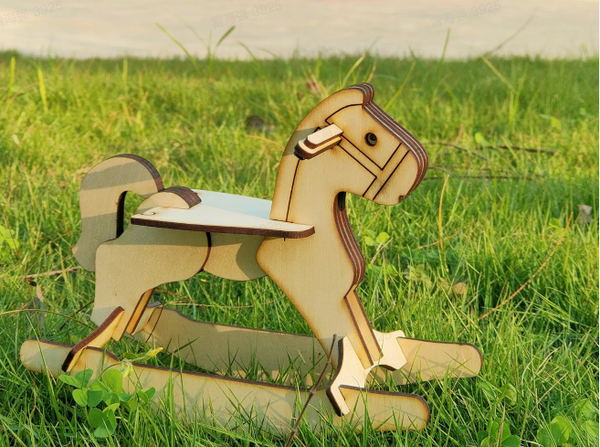
Step 7: After all, assemble the parts. The horse will need some finishing at the edges. Use sandpaper to do that. Finally, choose an attractive color and paint the rocking horse.
Hurray! The rocking horse is ready. It’s time to Rock!
Rocking Horse Laser Project Image:
SHARE:
