How to Make Screen Print Transfers at Home
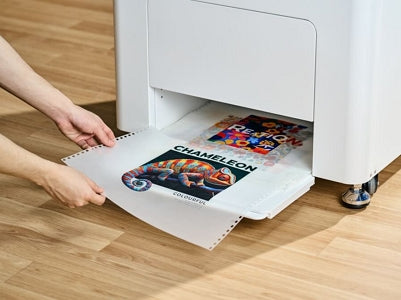
Screen printer transfers are like permanent stickers that stylize your favorite items. You simply screen print the design on special paper using plastisol ink, and then the design is transferred to clothing or other materials using a heat press.

Screen print transfers are a piece of cake to do at home; you can whip up unique and personalized outfits for parties in no time.
Plus, they are perfect for small businesses who want to start small. Like if you're a crafter selling custom apparel at craft fairs, with pre-made screen print transfers, you can apply them to a wide range of items beyond t-shirts, such as tote bags, hoodies, hats, and much more depending on your customer's needs. You can experiment with different designs without pre-printing a large quantity of garments. This flexibility means less inventory risk and more potential for profit.
In this article, we’ll walk you through the steps to make your screen print transfers at home, covering all necessary supplies you’ll need along the way.
In This Article
- Equipment and Supplies Needed to Make Screen Print Transfers
- Step-By-Step Guide to Make Custom Screen Print Transfers
- How to Heat Press Screen Print Transfers?
- FAQs of Making Screen Print Transfers
- Conclusion
Equipment and Supplies Needed to Make Screen Print Transfers
Ready to begin your crafting journey? Hold your horses—gather these essential items first:
Screen Printer
The primary tool you need is a screen printer, but we’re not talking about the old-fashioned screen printing process or those simple clamp machines.
If you opt for the old method, you may end up halting your journey right away after hearing about the long and tedious process involved—emulsion coating, design printing, exposure to UV light, cleaning, and drying. We suggest getting a modern solution like the xTool Screen Printer.
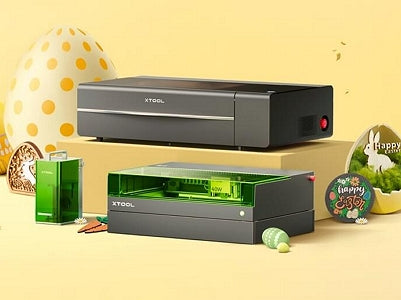
xTool screen printer itself is quite unique—it’s the first in the world to enhance the printing process with laser technology. Their screen printer comes with pre-coated screens; you just need to laser engrave your design onto them, and presto—your design stencil is ready for screen printing. This innovation reduces the days-long process to just a few hours and makes screen printing more accessible to everyone.

Laser engraving stencil vs traditional stencil making
It’s more than just a printer; it’s a complete screen printing solution. With the printing package, you receive pre-coated screens, inks, and all the essential screen printing supplies. Design, engrave, and print on any material using the xTool Screen printer.

Plastisol Transfer Paper
This is a special type of paper that holds the inked design and releases it onto a material when heat pressed.
Plastisol Ink
Plastisol inks are very popular for screen printing projects because they are vibrant and durable. Rather than embedding into the material, these inks stay on top of the fabric, forming a layer.
Plastisol inks consist of two main components: a powdery white Polyvinyl Chloride (PVC) resin and a dense, clear liquid plasticizer. These ingredients do not let it dry at room temperature. To fully cure plastisol ink designs, a temperature of about 300°F is required.
Plastisol Transfer Powder(optional)

There is also an adhesive powder available on the market that can be applied to the paper before transferring the design. This powder ensures a smoother transfer and better adhesion to the desired substrate; although it is possible to complete the transfer process without this powder.
A Conveyer Dryer
After transferring the screen-printed design, you need a conveyor dryer for the ink that gels ink to the transfer paper.
Step-By-Step Guide to Make Custom Screen Print Transfers
Once you have the tools, here are four simple steps to complete your screen print transfers:
Step 1: Prepare the Screen

©LaserEngraving 911 – YouTube
You may know that screen printing requires a mesh or silk screen for design transfer. With the xTool screen printer, you can easily create the stencil by laser engraving the pre-coated screens provided.

Load your design into the laser engraver and place the coated screen in it. The laser will precisely erode the coating and imprint your design onto the screen.

Step 2: Screen Print the Transfer

Mount the prepared silkscreen in the xTool Screen Printer. Place the transfer paper underneath the screen. Apply plastisol ink over the screen and use a squeegee to spread it evenly across the surface.
Step 3: Applying Adhesive Powder
Evenly sprinkle adhesive powder over the inked transfer paper. Then gently shake off any excess powder to ensure a clean surface.
Step 4: Curing the Transfer
Plastisol ink doesn’t dry at room temperature. Use a flash or conveyor dryer set to 200°F. The goal is not to fully cure the ink but to dry it just enough so it sticks to the transfer paper without fully setting.
How to Heat Press Screen Print Transfers?
Once your screen-printed transfers are ready, they can be applied to various surfaces – the common use case is t-shirts. To transfer your design, you need a heat press, which releases the plastisol ink from the transfer paper and bonds it to the fabric.
You can use the compact xTool Heat Press, which comes in both miniature and smart versions and is designed for ease of use. Start by placing your shirt on the heat press. Next, lay the transfer paper on the shirt, topped with a Teflon sheet to protect the design. Press at 330°F for about 10 seconds. Finally, peel off the transfer paper to reveal your design.

XTOOL HEAT PRESS
Multi-modal Heat Press for HTV, Sublimation, DTF, and Screen Print Transfers
RELATED: how to heat press a shirt?
FAQs of Making Screen Print Transfers
How to make full-color screen print transfers?
For full-color screen print transfers, prepare separate screens for each color in design. Screen print each ink color one by one, and let each layer slightly dry before the next application.
What is the difference between DTF and screen print transfers?
Although both methods are heat transfer printing, they use different printing techniques and inks. In DTF, the design is printed with special water-based inks using a digital printer. Whereas, in screen print transfer, the screen printing is done with plastisol inks.
Conclusion
Screen print transfers are simple to make, right? Are you eager to try some DIY screen print transfers at home?
Consider investing in the xTool Screen Printer and Heat Press. These tools will help streamline the process and allow you to tackle a variety of creative projects besides screen printing.


