How to Make A Clock ?- Step-By-Step DIY Guide
A clock is something we glance at multiple times a day. It’s something ordinary and functional, but have you ever wished to make it different? Something that catches the eye as soon as someone checks the time?
Well, you can custom-make a clock at home and turn it into a conversation starter. Don’t worry – you don’t need a toolbox full of gadgets. A simple DIY Kit and a laser cutter will do the trick.
This blog introduces the concept of making your own clock and other DIY projects using laser cutting.
In This Article
- What You Will Need?
- Step-by-Step Guide to Making Your Own Clock
- More DIY Clock Ideas for Your Inspiration
- Conclusion
What You Will Need?
To get started, you just need a laser cutter and xTool DIY Kit.
1. Laser Cutter
A laser cutter is the primary tool for this project. It’s not a manual tool but a highly precise, automated cutter that uses an ultra-thin laser to cut materials. The laser vaporizes the material, leaving a clean cut behind.
You don’t need an industrial laser for this job; a compact desktop laser cutter will suffice. Models like the xTool M1 or S1 are all suitable. Choose one based on your budget. If you already own a laser cutter, such as a Glowforge or OmTech Laser, the xTool DIY kit can complement it perfectly.
Besides making a clock, a laser cutter can be used to create various crafts, as it can cut hundreds of different materials. It is a one-time investment that opens the door to many creative possibilities.

2. xTool DIY Kit
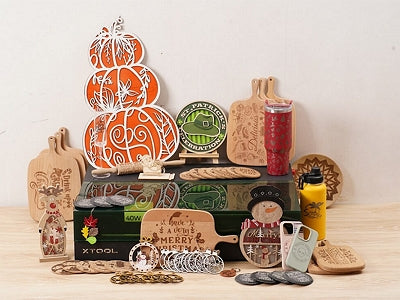
We don’t want you to spend hours searching for individual clock parts or materials. So, we have prepared a DIY Kit package containing every small component you need to create personalized items. This clock-making kit is one of the five DIY kits we have launched initially.

Here’s a sneak peek of what the xTool DIY Clock Kit contains:

Pre-Designed Laser Cutting Files
The core element of the entire process is the design file, and creating that yourself can be quite challenging. So, we offer pre-designed clock files in various designs; you can choose one as you like.
High-Quality Materials Package
The kit includes all the necessary laser-compatible materials, such as plywood and acrylic. It also contains smaller, hard-to-find components: clock hands, clock mechanisms, glue, nuts, hooks, and everything else you need.
Assembly Instructions
The Clock DIY Kit also contains detailed instructions on how each part fits together. Even the cutting and engraving parameters are provided to make the process smooth.
Step-by-Step Guide to Making Your Own Clock
Here’s how to use the xTool’s Clock DIY Kit:
Step 1: Import the Laser Cutting Files
From all available laser cutting files, choose one that you like. You can customize it as well or create your own based on the existing designs. Once you have made your choice, import the design into laser cutting software.

Step 2: Laser Cut the Clock Parts
The DIY clock is made up of a collection of laser-cut parts. Use your laser cutter, as per the recommended parameters, to cut each component, following the design files you imported.

Step 3: Assemble and Decorate
Once all parts are cut, assemble them according to the detailed instructions provided in the kit. You can further personalize the clock face with paint, stain, or other decorative elements.


More DIY Clock Ideas for Your Inspiration
Besides the kit, there are numerous creative clocks that xTool users have made with our laser cutting machines. Our xTool Projects community gets regular updates with new projects.
Here are a few designs for your inspiration:
Steampunk Multilayer Wooden Wall Clock

Multi-layered Wooden Clock ©LaserCutano – xTool Projects
This clock features a multi-layered design that looks great on any wall, adding depth and a mechanical look. It suits a living room, office, or any space with a vintage or industrial theme. To make this clock, cut multiple layers of wood using your laser cutter and then glue them together.
Family Tree Wooden Wall clock

Family Tree Wooden Wall Clock ©Joellethibert – xTool Projects
Create a clock that uniquely celebrates your family. This design features a family tree, making it perfect for a living room or family room. The user has laser-cut heart shapes and engraved names onto it. You may do the same or engrave photos as well.
Bunny Fun Clock

Cartoon-themed Clock ©need.it - xTool Projects
This is a cartoonish clock, featuring small bunny faces. The design file could be customized to contain other faces as well. The face of the clock is laser-scored and then hand-painted. The clock’s perfect place is a kids' room – or could serve as a decor for Easter.
Engraved Ceramic Clock

Engraved Ceramic Clock ©xTool Projects
This is a Halloween-themed ceramic clock that adds a spooky touch to your decor. The design is engraved on a raw ceramic plate using the xTool F1. You may take any circular ceramic plate and then engrave it with your favorite design.
Father’s Day Clock

A customized clock made for fathers, featuring different memories spent together from childhood to teenage years. It is made with colored acrylic and basswood to cut out the pieces. The xTool S1 are ideal options for cutting this design. The design file is also available, and you can alter and customize it to your liking.
Conclusion
If you love customized items, there’s nothing more rewarding than making them yourself. It’s pure fun and a great sense of achievement when you complete a project. The xTool DIY Kit is your perfect companion on this creative journey.
Get your kit today and share with us how you used it to create your personalized clock. We would love to see your unique designs and hear about your experience!


